If you've been searching for a way to workout with resistance bands at home, you're already ahead of most people. No crowded gym, no expensive equipment, no commute. Just you, a small strip of elastic, and a surprising amount of challenge waiting to be unlocked. The truth is, resistance band training has quietly become one of the most effective and underrated fitness methods available, and it works beautifully in a living room, bedroom, or backyard.
This guide is your complete roadmap. Whether you're a total beginner stepping away from the couch for the first time, or a seasoned gym-goer looking to maintain strength between sessions, everything you need is right here. We'll walk through the exercises, the routines, the recovery work, and the real-world habits that make it all stick.
Why Resistance Bands Belong in Every Home Gym
Let's be honest. Most home fitness equipment ends up as an expensive clothes hanger. Treadmills, rowing machines, weight benches, they all promise transformation and deliver guilt. Resistance bands are different, and here's why they actually get used.
They Meet You Where You Are
Resistance bands create what fitness coaches call "accommodating resistance." As you move through an exercise, the challenge increases with your range of motion. That means your muscles are working harder at the exact point where they're strongest, which is the opposite of what happens with fixed weights. The result is a more complete muscular stimulus with less joint strain.
For beginners, this is a gift. You're not fighting gravity with a rigid barbell the moment you step out of bed. For advanced athletes, it's a serious tool that professional sports teams and physical therapists have relied on for decades.
They Fit Into Real Life
A full set of resistance bands fits inside a small pouch. You can toss them in a carry-on bag, slip them in a desk drawer, or leave them on the coffee table as a reminder to move. There's no setup, no assembly, and no waiting for a machine to free up. When the barrier to starting is almost zero, you actually start.
This portability also means your workout travels with you. Business trip? Guest bedroom at your parents' house? Early morning in a hotel room before the kids wake up? The bands come with you, and the workout happens.
They're Genuinely Effective for Everyone
Research consistently shows that resistance band training produces comparable strength and muscle gains to free weight training, especially for beginners and intermediate exercisers. They're also remarkably effective for rehabilitation, mobility work, and athletic performance. Yoga practitioners use them to deepen stretches. Dancers rely on them to build the specific strength their art demands. Pilates instructors incorporate them into core and stability work.
"The best workout tool is the one you'll actually use consistently. Resistance bands remove almost every excuse not to train." A perspective shared by personal trainers across every fitness discipline.
Getting Started: What You Need Before Your First Session
Before you jump into your first workout with resistance bands at home, a few minutes of preparation will make every session safer, more effective, and more enjoyable. Think of this as setting up your environment for success.
Choosing the Right Band for Your Goals
Not all resistance bands are created equal, and using the wrong one is a fast track to frustration or injury. The main types you'll encounter are loop bands (closed circles), long straight bands, and figure-eight bands. For most home workouts, a fabric loop band is the most versatile starting point. It stays in place on your skin without rolling or snapping, making it comfortable for lower body exercises, hip work, and stretching routines.
Tension level matters enormously. A band that's too light won't challenge your muscles enough to create change. A band that's too heavy will compromise your form and increase injury risk. Most people benefit from having at least two tension options available, one lighter for upper body and mobility work, one heavier for squats and hip-focused movements.
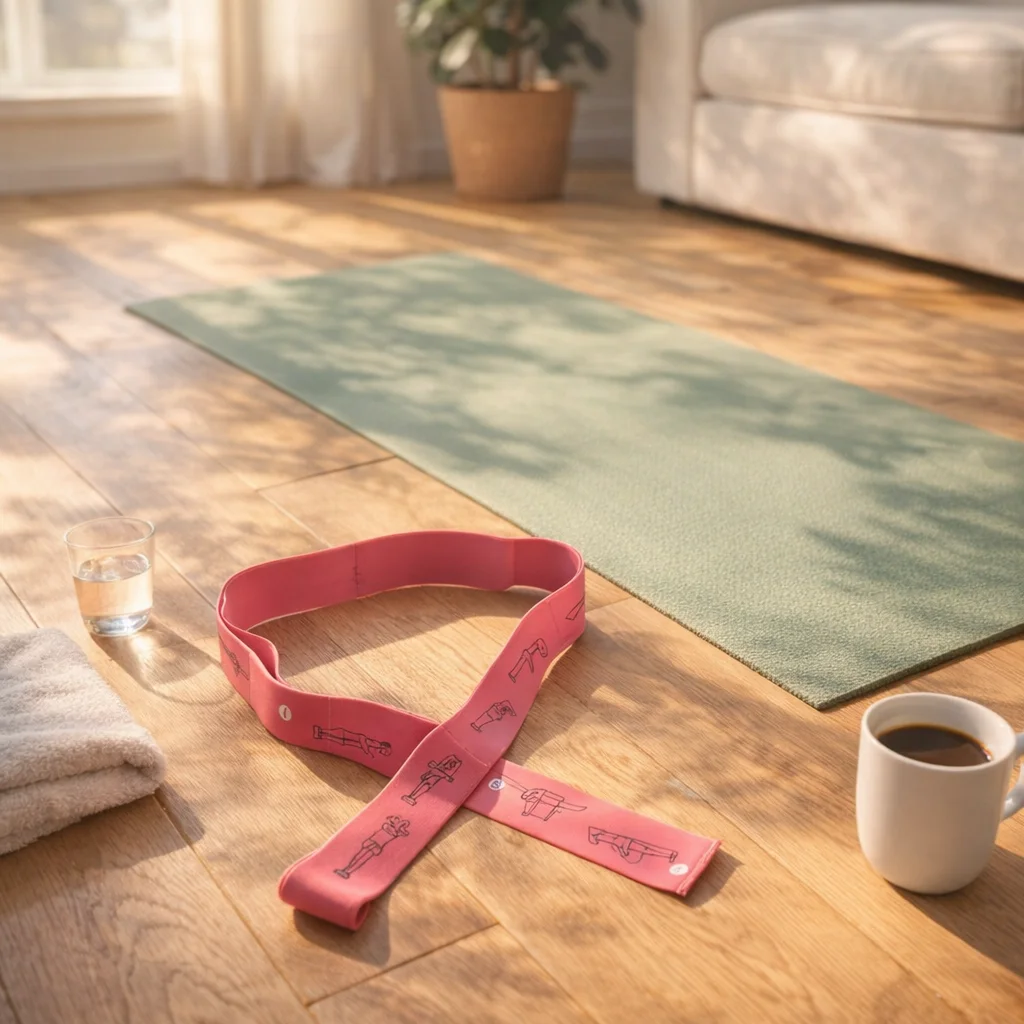
The Stretchly Yoga Resistance Band is worth considering here. It's designed specifically for the range of movements that matter most in home training, from deep stretching and Pilates-inspired core work to dynamic resistance exercises. The fabric construction means it stays put during even the sweatiest sessions, and the loop format makes it instantly usable without any anchoring setup. You can find it at Stretchly's online store.
Setting Up Your Space
You don't need a dedicated gym room. You need approximately six feet by six feet of clear floor space. That's it. A yoga mat or even a folded blanket gives you a comfortable surface for floor exercises. Make sure there's nothing sharp or abrasive nearby that could catch or nick the band.
Good lighting matters more than people realize. Being able to see your form, either directly or in a mirror, helps you correct technique in real time. Even propping your phone up to record yourself occasionally can reveal form issues you'd never catch otherwise.
Warming Up Properly
Cold muscles and resistance bands are not a good combination. A five to ten minute warm-up primes your joints, increases blood flow, and mentally shifts you into workout mode. Try this simple sequence before any band session:
- Thirty seconds of arm circles in each direction
- Ten slow hip circles on each side
- Ten bodyweight squats with a focus on depth and control
- Twenty seconds of leg swings on each side
- A thirty-second light walk or march in place
This takes less than eight minutes and dramatically reduces your injury risk while improving the quality of your first few sets.
The Ultimate Full-Body Workout with Resistance Bands at Home
Here's a complete workout with resistance bands at home that covers every major muscle group. You can run this as a single full-body session three times per week, or split it into upper and lower body days if you prefer training more frequently.
Lower Body Exercises
The lower body is where resistance bands truly shine. The hip and glute muscles respond exceptionally well to the lateral and rotational resistance that bands provide, movements that are nearly impossible to replicate with traditional weights.
Banded Squats: Place the loop band just above your knees. Stand with feet shoulder-width apart. As you squat down, actively push your knees outward against the band's resistance. This activates the glute medius, the muscle that gives you stable hips and a rounder backside. Aim for three sets of twelve to fifteen reps.
Lateral Band Walks: Keep the band above your knees and lower into a quarter-squat position. Step sideways for ten steps in each direction, maintaining tension in the band throughout. This targets the outer hips and thighs in a way that almost nothing else does.
Glute Bridges: Lie on your back with knees bent and the band across your hips, anchored by your hands. Drive your hips toward the ceiling, squeezing hard at the top. This is one of the most effective glute exercises in existence, and the band adds a load that bodyweight alone cannot provide.
Standing Kickbacks: Loop the band around both ankles. Hold a wall or chair for balance. Drive one leg straight back behind you, squeezing the glute at the top of the movement. Three sets of fifteen on each side builds serious posterior chain strength.
Upper Body Exercises
Upper body work with bands requires a bit more creativity since you can't anchor them to the floor as naturally. But with a door anchor or a sturdy piece of furniture, you open up a wide range of pulling and pressing movements.
Banded Rows: Anchor the band around a door handle or wrap it around a stair railing. Step back until there's tension in the band, hinge slightly at the hips, and pull both handles toward your ribcage. This builds the back muscles that improve posture and counteract hours of sitting.
Bicep Curls: Stand on the center of the band with feet hip-width apart. Hold the ends or handles and curl your hands toward your shoulders. Control the lowering phase slowly, that's where much of the muscle-building stimulus lives.
Overhead Press: Step on the band and hold the ends at shoulder height. Press straight overhead until your arms are fully extended, then lower slowly. This challenges the shoulders and triceps in a smooth, joint-friendly arc of motion.
Chest Press Variation: Anchor the band behind you at chest height. Step forward to create tension and press both arms forward as if performing a chest press. The instability of the band forces your stabilizing muscles to work overtime.
Core and Stability Work
Bands add a dimension to core training that bodyweight exercises alone can't replicate: rotational and anti-rotational resistance. These movements build the functional core strength that protects your spine in everyday life.
Pallof Press: Anchor the band at chest height to your side. Stand perpendicular to the anchor, hold the band at your chest, and press straight forward. Resist the band's pull to rotate you. Hold for two seconds, then return. This is the gold standard for anti-rotation core training.
Banded Dead Bug: Lie on your back and hold the band anchored overhead. Extend opposite arm and leg while keeping your lower back pressed to the floor. The band adds upper body tension that makes this classic core exercise significantly more challenging.
Standing Wood Chop: Anchor the band high on one side. Pull it diagonally across your body from high to low, rotating through your core. This mimics real-world rotational movements and builds the oblique strength that protects your back during daily activities.
Using Bands for Stretching, Flexibility, and Recovery
Here's a dimension of resistance band training that most people completely overlook: they're extraordinary tools for flexibility and recovery work. This is where a good stretching belt or loop band earns its keep on rest days and after tough sessions.
Assisted Stretching Techniques
Using a band to assist your stretches allows you to go deeper than passive stretching while maintaining control. Loop the band around your foot while lying on your back, then gently pull your leg toward you. The band lets you hold the stretch at the edge of your range of motion without straining to keep your leg elevated.
This technique is particularly valuable for the hamstrings, hip flexors, and calves, the muscles most chronically tight in people who sit for work. Spending ten minutes on assisted stretching after each workout dramatically accelerates flexibility gains compared to stretching alone.
The Stretchly Yoga Resistance Band doubles beautifully as a stretching belt. Its length and flexibility make it ideal for these assisted stretches, and the soft fabric construction means it's comfortable against bare skin during longer holds. It's a genuinely versatile tool that earns its place in your routine beyond just strength training.
Mobility Work for Problem Areas
Mobility is the combination of flexibility and strength through a range of motion. It's what allows you to move well, not just stretch. Bands are uniquely effective for mobility work because they provide resistance through movement, not just at the end range.
For the hips, try the banded hip flexor mobilization: anchor the band low and loop it around your hip crease. Step forward into a lunge position and let the band pull your hip back while you drive forward. This creates a distraction force that opens the hip joint in ways that static stretching cannot.
For the shoulders, a simple band pull-apart is one of the most valuable exercises you can do. Hold the band with both hands in front of you, arms straight, and pull it apart until your arms are wide to your sides. This opens the chest, activates the rear deltoids, and counteracts the forward rounding that comes from keyboard work and phone use.
Recovery and Cool-Down Protocols
The cool-down is the most skipped part of any workout, which is a shame because it's when a lot of the adaptation actually happens. A ten-minute cool-down with your band can dramatically improve how you feel the next day.
End every session with three to five assisted stretches, holding each for thirty to sixty seconds. Focus on the muscles you worked hardest. Breathe deeply and consciously relax into each stretch rather than forcing it. This parasympathetic shift, from workout intensity to calm recovery, signals your body to begin the repair process that builds strength and flexibility over time.
Common Mistakes That Kill Your Progress (And How to Avoid Them)
Most people who try to workout with resistance bands at home and give up aren't failing because bands don't work. They're failing because of a handful of predictable, completely avoidable mistakes. Here's how to sidestep every one of them.
Using the Wrong Tension Level
This is the number one mistake. Using a band that's too light feels like you're doing something but produces almost no training stimulus. Your muscles adapt to stress, and if there's no meaningful stress, there's no meaningful change.
A good rule of thumb: the last two or three reps of each set should feel genuinely challenging. If you could do twenty more reps without much effort, you need more tension. If your form breaks down completely in the first few reps, dial it back. Finding this sweet spot is the skill that separates people who get results from people who wonder why nothing is changing.
Ignoring Time Under Tension
Speed kills results in resistance training. Many people snap through their reps quickly, letting momentum do the work instead of their muscles. The actual stimulus for muscle growth and strength comes from sustained tension, not from moving a band from point A to point B as fast as possible.
Try this: count two seconds on the way up, pause for one second at the peak contraction, and count three to four seconds on the way down. This tempo feels brutally slow at first, but the results speak for themselves. Your muscles will fatigue much faster, and that fatigue is the signal that drives adaptation.
Skipping the Progression
Your body adapts. What challenged you in week one will feel easy by week six, and that's a sign of progress, not a reason to keep doing the same thing. The principle of progressive overload applies to band training just as it does to weight training.
You can progress in several ways: increase the band tension, add more reps, slow your tempo, reduce rest time between sets, or add more sets. Track your workouts in a simple notebook or phone app so you can see where you were and where you're going. This visibility is one of the most powerful motivators in fitness.
"Progress isn't always visible in the mirror, but it's always visible in your training log. Track your sessions and you'll never wonder if you're improving."
Building a Weekly Routine You'll Actually Stick To
The best workout plan is the one you follow consistently. Not the most scientifically optimal one, not the one your favorite influencer swears by, the one that fits your life and gets done week after week.
Sample Weekly Schedules
Here are three realistic templates based on how much time you have:
Three Days Per Week (Full Body): Monday, Wednesday, Friday. Each session covers lower body, upper body, and core. This is the most efficient structure for beginners and anyone with a busy schedule. Rest days on Tuesday, Thursday, Saturday, and Sunday allow full recovery.
Four Days Per Week (Upper/Lower Split): Monday and Thursday for lower body and core, Tuesday and Friday for upper body and core. This allows more volume per muscle group while still providing adequate recovery. Ideal for intermediate trainees who want to progress faster.
Five to Six Days Per Week (Push/Pull/Legs): More advanced structure for those who genuinely enjoy training frequently. Day one: chest and shoulders. Day two: back and biceps. Day three: legs and glutes. Repeat with a rest day built in. This level of frequency requires excellent sleep and nutrition to support recovery.
Making It a Habit
Habit research consistently shows that attaching a new behavior to an existing one dramatically increases follow-through. This is called habit stacking. Instead of trying to carve out an entirely new time slot in your day, attach your workout to something you already do reliably.
Work out immediately after your morning coffee. Train during your lunch break. Do your band session right after you put the kids to bed. The specific time matters far less than the consistency of the trigger. Once the habit is established, motivation becomes almost irrelevant because the behavior is automatic.
Tracking Progress and Staying Motivated
Motivation is unreliable. It peaks when you start and dips when life gets hard. Systems are more reliable than motivation. Build a system that keeps you accountable even when you don't feel like it.
Take a photo every four weeks under consistent lighting. Note how your clothes fit differently. Pay attention to how you feel climbing stairs or carrying groceries. These non-scale victories are often the most meaningful early indicators that your training is working, and they keep you going when the mirror isn't showing dramatic changes yet.
Consider sharing your goals with someone who will check in on you. A training partner, a friend, or even a social media community creates a layer of accountability that solo training lacks. You're far less likely to skip a session when someone else knows you planned to do it.
Frequently Asked Questions
Can you really build muscle with resistance bands, or do you need weights?
Yes, you can absolutely build muscle with resistance bands. Muscle growth requires progressive tension and mechanical stress on the muscle fibers, and bands deliver both. Research comparing band training to free weight training shows similar gains in muscle size and strength for beginners and intermediate exercisers. The key is applying the same principles: progressive overload, adequate volume, and proper nutrition. Many people actually find that bands produce better mind-muscle connection because the constant tension keeps the target muscle engaged throughout the entire movement.
How often should I workout with resistance bands at home?
Three to four sessions per week is the sweet spot for most people. This provides enough training frequency to drive adaptation while allowing adequate recovery between sessions. If you're training full body each session, three days with rest days in between works well. If you're splitting muscle groups, four days allows more volume without overtraining. Beginners often see results training just three times per week because their muscles are responding to any new stimulus. More advanced trainees may need four to five sessions to continue progressing.
Are resistance bands good for weight loss?
Resistance band training supports weight loss in two important ways. First, it burns calories during the session itself. Second, and more importantly, building muscle through resistance training increases your resting metabolic rate, meaning you burn more calories even when you're not exercising. Resistance training is actually more effective for long-term body composition change than cardio alone, because it reshapes your body while also improving your metabolism. Pair your band workouts with a modest caloric deficit and adequate protein intake for the best results.
What's the difference between resistance bands and stretching belts?
The terms often overlap, and many bands serve both purposes. A stretching belt is typically used to assist flexibility work, helping you hold deeper stretches with control and without strain. A resistance band is used to add load to strength exercises. A high-quality fabric loop band, like the kind designed for yoga, Pilates, and dance training, can serve both functions beautifully. You can use it for banded squats and kickbacks in one session, then use it for assisted hamstring and hip flexor stretches in your cool-down. This versatility makes a good multi-purpose band one of the best investments in your home fitness toolkit.
How do I know when to increase the resistance level?
A simple rule: when you can complete all your planned reps with perfect form and the last two reps feel only moderately challenging, it's time to progress. You can move to a heavier band, add more reps to your sets, slow your tempo significantly, or reduce rest periods between sets. Avoid the temptation to jump to a band that's dramatically heavier than your current one. Small, consistent progressions over time produce far better results than sporadic jumps in difficulty that compromise your form and increase injury risk.
Start Your Home Resistance Band Journey Today
The ability to workout with resistance bands at home is genuinely one of the most accessible, effective, and sustainable fitness habits you can build. No gym membership, no complicated equipment, no excuses. Just consistent effort, a solid plan, and the right tool in your hands.
Everything covered in this guide works. The exercises are proven, the routines are realistic, and the principles behind them are backed by decades of exercise science. But none of it matters if you don't start, and you don't need to start perfectly. You just need to start.
If you're ready to invest in a band that handles everything from strength training to deep stretching and recovery work, the Stretchly Yoga Resistance Band is designed for exactly this kind of versatile, at-home training. It's built for the full range of what home fitness actually looks like: the intense sessions, the recovery days, the yoga mornings, and the Pilates evenings. One tool, every goal.
Pick up your band, clear a small space in your living room, and take the first step toward the stronger, more flexible version of yourself that's been waiting. The workout starts now.